Thursday, May 21, 2009

Wrapping it up

The final inspections for the building and electrical passed on Monday. Most loose ends are cleaned up. My dad and I installed a storage cabinet to contain the toys and hot tub supplies. Baby gate is painted to match the railing.

It's still kinda hard to believe it's done. This has been a dream for several years. I'm so glad we decided to make it happen early this year. Now, we have the whole summer to enjoy it. Chris and Ryan did a great job. I couldn't be happier with the outcome of this project.

A photo gallery from start to finish follows...


Monday, May 11, 2009

Finishing touches

We're getting close to completion now. Just a few things left. My dad got the fans installed, and we got all the posts and beams painted. Chris and Ryan finished up their final task: installing the railing.

A few weeks ago, I had to decide on the railing we should use. It took me several days to find a railing I was happy with. Since the rest of the deck is essentially maintenance free, I wanted the railing maintenance free as well (so, no cedar). But, most iron or aluminum railing didn't have a flat top cap where you can sit your drinks, and I didn't really like the look of composite railing. I finally found an aluminum railing with a flat top cap. And, it's made by Hansen Architectural right here in Hillsboro. It's a great looking rail in matte black. And, it's very sturdy.

Wednesday, May 6, 2009

Ceiling

The electrical inspection passed yesterday, which gave Chris and Ryan the go-ahead to install the cedar ceiling boards.

I'd spent the previous weekend pre-staining the cedar. I figured staining them at waist level in the garage would be much easier than wielding a brush overhead on a 9' ceiling. I had a good system going in the garage. Throw three boards up on the sawhorses, stain, then toss 'em over on the drying rack.


The deck boards and railing are composite and aluminum because I want a no-maintenance deck. Since the ceiling boards are not exposed to any weather, I decided on this tight-knot cedar. I'm glad I did. Check out this shot of the ceiling:

Sunday, May 3, 2009

Gazebo

If I had to identify the most challenging part of this deck design, it would be the gazebo. The reason is it shares two posts with the main roof structure. This requires it to overlap with, and be placed slightly below, the main roof.


Toward the end of the design process we lowered the main roof structure. This forced the gazebo roof too low, not leaving enough head clearance over the entry to the staircase. After much thinking on this, we decided to solve the clearance problem by cutting the staircase back into the deck area a few feet. So, by the time your head is near the gazebo roof, you've already stepped down two stairs, leaving plenty of room to avoid a headache.

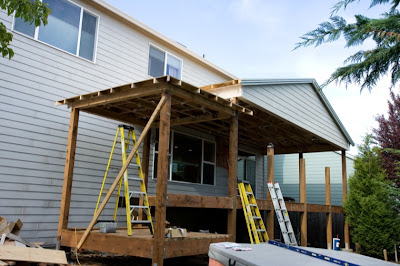
You can see the stairs cut back into the deck in this picture. Originally, the top of the stairs would have aligned with that white post.


All along, it was hard to visualize what this gazebo would look like. I am very happy with the way it turned out. Seeing a design come to life in a physical building is very cool.